Introduction
If you’ve asked an image model for a social media post, you know the result. The layout looks fine at a glance, then you notice the text is garbled, the logo is “inspired by” yours, the colours drift, and every post looks like it came from a different designer.
The fix: don’t let the AI draw the design. Let it operate a design system.
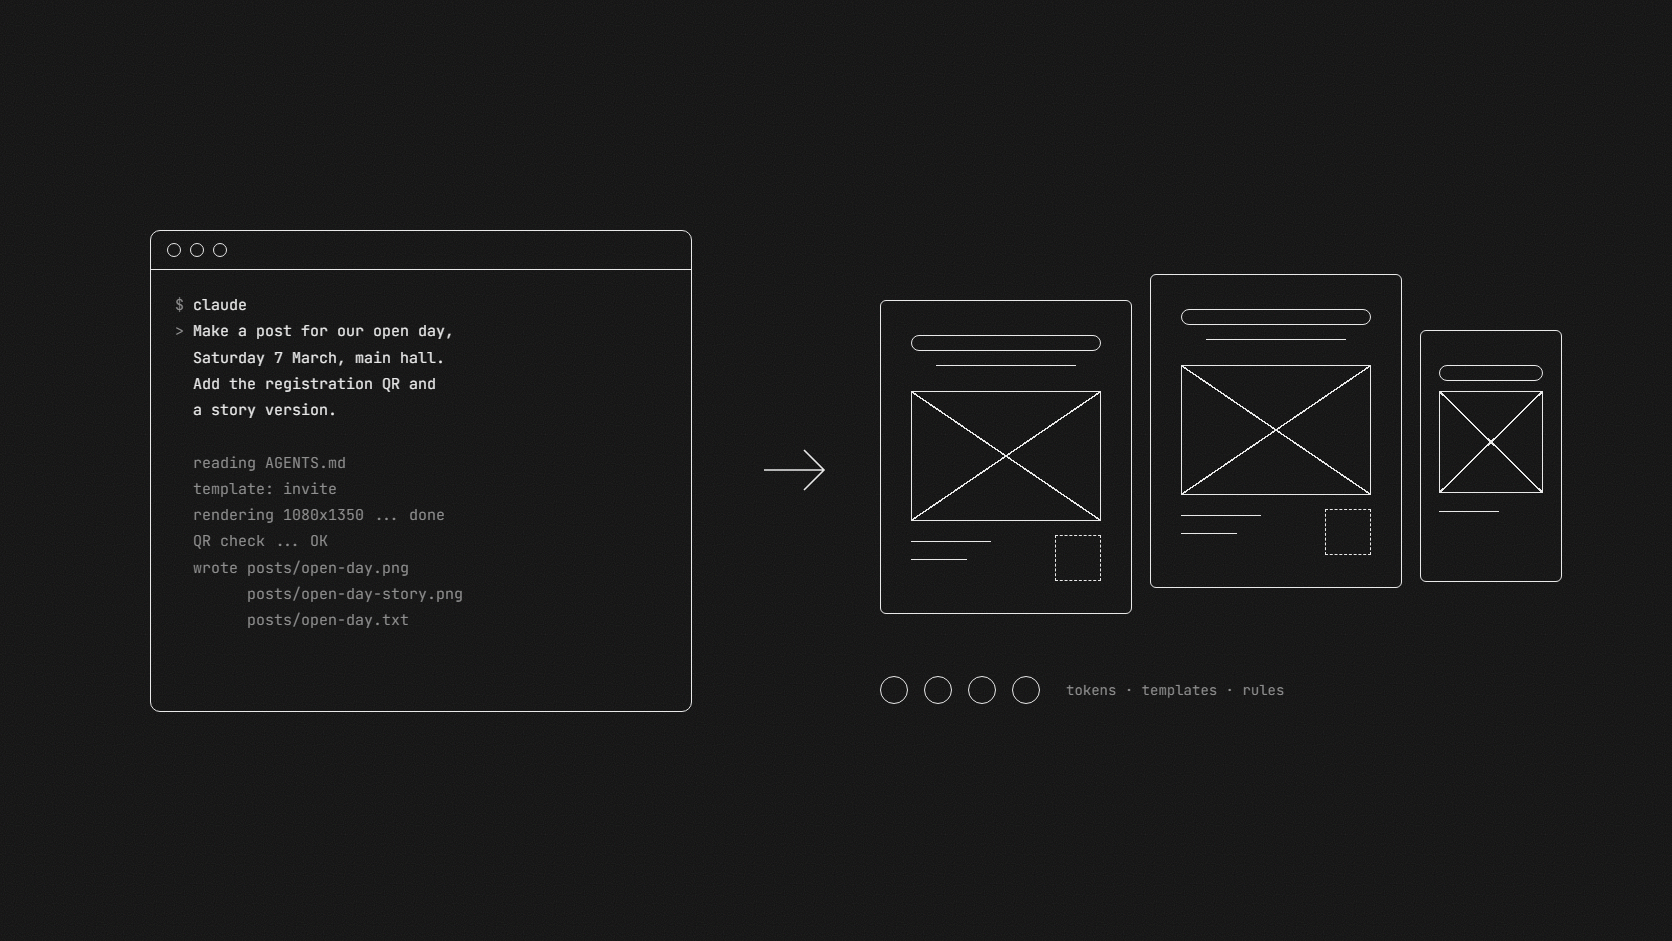
The design system is plain HTML and CSS. It holds the brand’s real colours, fonts, logos and layouts, and a script renders it to PNG with headless Chrome. The AI’s job is the part it’s good at: reading a messy brief, picking the right template, writing the copy, placing the content, and checking the result. Image generation is used only for art (illustrations, textures, background photos), never for text or logos.
When it’s done, you type something like this:
Make a post for our open day on Saturday 7 March, 10:00–16:00
in the main hall, free entry, registration at example.com/open-day.
Make the story version too.
and get a finished feed post, a story, a caption and a scannable QR code, all on brand.
This guide walks through building one for any brand, step by step, and ends with ready-to-paste prompts for every stage.
Why Deterministic Beats Generated
| Image generation | HTML/CSS design system | |
|---|---|---|
| Text | Often garbled, especially in non-Latin scripts | Real fonts, always correct |
| Logos | Redrawn, distorted | The real files |
| Colours | Drift between images | Exact tokens |
| Consistency | Each design is a new guess | Same layouts every time |
| Editing | Regenerate and hope | Change one line, re-render |
| Multiple languages | Hard | Swap text, flip direction |
The AI still does a lot. It writes the copy, picks the layout, sizes things, makes the illustrations, and catches its own mistakes. The design system makes those decisions cheap and repeatable.
The Architecture
The whole system is one folder:
brand.css          tokens + every component as a CSS class
brand.js           icons, photo duotone, auto-fitting titles
render.mjs         posts/x.html -> posts/x.png (headless Chrome)
templates/*.html   one file per post type + a rendered preview
AGENTS.md          the rulebook: workflow, brand, templates, QA
assets/logos/      transparent logo PNGs in every colour
assets/art/        textures, patterns, sample art and photos
assets/_reference/ screenshots of real past posts
tools/             helper scripts (QR codes, patterns, checks)
posts/             output: HTML + PNG + caption per post
Three things make it work:
- Tokens and components live in one CSS file. A post is just HTML with classes like
.title,.facts,.photo-frame. The AI never invents styling; it picks from what exists. - Templates are real posts. Each template is a fully designed example with realistic content. Making a new post means copying the closest template and changing the content.
AGENTS.mdis the product. The rulebook encodes the brand’s taste so a fresh AI session makes the same decisions you would. Claude Code readsCLAUDE.mdautomatically; make yours a single line,@AGENTS.md, so Codex and other agents that readAGENTS.mdshare the same rules.
Step 0 — What You Need
- An AI coding agent that can read and write files and run commands: Claude Code or Codex.
- Node.js and Chrome or Edge, for rendering. No npm packages needed.
- Python with Pillow for image work (trimming, extracting logos), plus
qrcodeandopencv-pythonif you want QR codes. - Optional: an image model the agent can call from the command line, so it can commission its own illustrations. Codex’s built-in image generation works well for this.
- The brand’s real sources: logo files, the designer’s source files (
.ai,.psd,.fig, PDFs), the colour palette, and screenshots of 10–15 past posts.
Step 1 — Audit the Brand From Its Real Sources
Don’t describe the brand to the AI. Give it the sources and let it extract the facts. This step is what makes the result look like your brand and not “a nice template”.
What to extract, and how:
- Fonts, read from inside the design files. PDFs and
.aifiles embed the fonts they use, and PyMuPDF can list them in a few lines (page.get_fonts()). This beats guessing from screenshots, and it often turns out the brand fonts are free on Google Fonts. - Logos split out of the designer’s master files. A master
.aifile often holds every logo variant, one per artboard. Render each page, threshold it into a transparent PNG, and recolour it into the variants you need (light, dark, accent). - Colours from the palette, plus anything sampled from real designs. Official palettes are often incomplete. Gradients, tints and background colours can be sampled pixel by pixel from the designer’s own files.
- Layout patterns from past posts. The recurring post types (announcements, invitations, quotes, event covers) become templates. The recurring visual “moves” (a shadow style on titles, a frame around photos, a texture) become named CSS classes.
Tip: keep screenshots of real posts in
assets/_reference/. Every time the AI finishes a design, have it compare against them. “Does this look like it belongs on our feed?” is the single most useful QA question.
Step 2 — Tokens and Components in One CSS File
brand.css starts with the tokens:
:root {
  --ink:    #1A2B3C;   --primary: #2F6F73;
  --paper:  #F5F0E8;   --accent:  #E4572E;  /* ≤ 10% of a post */
  --f-body:    'Inter Tight', sans-serif;
  --f-display: 'Fraunces', serif;           /* titles only */
  --pad: 72px;                              /* safe margin */
}
Then one class per component, with the canvas defined in real pixels:
/* Instagram feed 4:5 */
.post       { width: 1080px; height: 1350px; padding: var(--pad); }
.post.story { height: 1920px; }
.title      { font: 700 140px/1.1 var(--f-display); }
.title.pop  { text-shadow: 6px 6px 0 var(--accent); }
.facts      { display: flex; }      /* date / place / price */
.photo-frame { background: #fff; padding: 18px; }
Rules that keep it clean:
- Every colour is a token. No hex values in templates or posts.
- Name components after what they are in the brand, such as
.facts,.photo-frameor.title.pop. Those are easier for an AI (and a human) to reason about than.box-3. - Comment anything non-obvious, including why. For example:
/* this font sits low in its line box, so titles get extra bottom space */. The AI reads those comments too.
Step 3 — Templates and the Render Pipeline
Each template is a complete HTML page that links brand.css:
<main class="post bg-primary">
  <div class="kicker">You're invited to</div>
  <h1 class="title pop">Open Day</h1>
  <div class="meta">Saturday – 7 March</div>
  <div class="hero"><img src="../assets/art/illustration.png"></div>
  <div class="facts">
    <div class="fact"><b>Where</b><span>Main hall</span></div>
    ...
  </div>
</main>
Rendering is a dozen lines of Node. Read the canvas size from the class (.story means 1080×1920) and ask headless Chrome for a screenshot:
execFileSync(chrome, [
  '--headless=new', '--hide-scrollbars',
  '--force-device-scale-factor=1',
  `--window-size=1080,${height}`,
  '--virtual-time-budget=10000',   // let web fonts load
  `--screenshot=${out}`, pathToFileURL(file).href,
]);
That’s the whole engine. No React, no build step, no design tool API. Because everything is HTML, the AI can edit it precisely, and you can open any post in a browser and adjust it by hand.
Start with 5–8 templates covering your most common post types, and render each one so a .png preview sits next to it. The AI uses the previews to choose.
Step 4 — Write the Rulebook (AGENTS.md)
This file turns “a folder of CSS” into “a designer that works from one sentence”. Give it these sections:
- Defaults. What to deliver by default (for example, feed post plus caption), what extras certain words trigger (“story”, a language name, “options”), and taste rules (“background art stays subtle”, “prices go in the caption, not the design”).
- Workflow. Extract the brief into fields, pick a template, copy it, edit only the content, render, look at the PNG, run QA, write the caption, reply with file paths.
- Brand rules. Colour roles and proportions, the type scale, date and number formats, layout rules, and a “Never” list: emoji in the design, recoloured logos, text inside generated images, AI-generated faces.
- Signature moves. A table mapping each recognisable visual trick to its CSS class and a reference post where it appears.
- Templates. One line each on what it’s for and what to edit, plus a decision rule (“has a speaker → talk template”).
- Art generation recipes. Exact prompt templates for illustrations, photos and textures, plus a reject list.
- Caption format, copied from your real captions.
- QA checklist. Overlaps, margins, spelling, the weekday matches the date, QR codes scan, and a comparison with the reference posts.
- How to extend the system without breaking it.
The most important rule: when you correct the AI, make it update the rulebook. A one-off fix helps one post. A rule helps every post after it.
Test it with a fresh agent
Once the rulebook exists, hand a fresh agent (one that knows nothing about your session) a one-line brief and nothing else. Ask it to follow AGENTS.md exactly, then report every place the rules were unclear or missing.
Expect a good post plus a list of gaps: a field the brief had but no template slot for, ambiguous date formats, a file-naming question, a broken helper command. Fix each one in the rulebook. This is the cheapest QA you’ll ever do.
Step 5 — Art That Doesn’t Look AI-Made
Art is the one place image generation earns its keep, and only with strict rules:
- One subject, named concretely: “a stack of five old hardcover books with a small potted plant”, not “books”.
- Pass the palette as hex codes, and say where the accent colour goes (“accent only on the backpack”).
- Always say “no text or letters”. Otherwise models put fake lettering on everything.
- No faces. Hands, silhouettes and people seen from behind are fine.
- Ask for a genuinely transparent background for illustrations, then trim the margins.
- For photos, ask for a candid phone photo: “imperfect casual framing, realistic phone-camera exposure, not a styled shoot”. A polished stock look is what reads as AI.
- Reject and regenerate on any letters, warped geometry, off-palette colours, glow, or more than one subject.
An illustration recipe for your rulebook:
Flat vector editorial illustration of [ONE concrete subject].
Strict limited palette only: [BACKGROUND HEX], [LIGHT HEX],
[MID HEX], [DARK HEX] for shading, [ACCENT HEX] only on [1–2
small details]. Clean geometric shapes with subtle soft shading,
no outlines, no glow, no text or letters anywhere, no faces.
Single centred subject with generous empty margin. Genuinely
transparent background (alpha), landscape 1536x1024.
Anything with a strict structure should be drawn in code, not generated: borders, geometric or cultural patterns, maps and routes, charts, QR codes. A small script that places every element on a grid is exact every time. An image model gets these nearly right, which is worse than not using them.
Step 6 — The QA Loop
After every render, the agent should look at the PNG (agents like Claude can read images) and run the checklist. Automate whatever you can with tiny scripts:
- Decode QR codes from the final image, not just the source file. A QR code that gets resized too small can stop scanning, and only checking the rendered post catches that.
- Check the weekday against the date in one line of code.
- Measure free space. To place background art without it running under text, have a script scan the rendered image for empty bands.
- Check for overflow (text running outside its box or past the safe margin) before calling a post done.
The rule: every “it looks fine” should be a check the agent can run.
Step 7 — Iterate on Taste
The first versions will be good but generic. Quality comes from short feedback rounds, each turned into a system change rather than a one-off fix. Some typical ones:
- “This looks like a generic template.” Compare against
assets/_reference/and replace the generic part (often icon-in-a-circle cards or glassy boxes) with how your real posts do it. - “The background art is distracting.” Tone it down (thinner, lighter, only visible in gaps) and make that the default in the rulebook.
- “That colour is too strong here.” Ask for 4–5 options rendered side by side, pick one, and save it as a named variant (for example
.title.pop.soft). - “The text sits off-centre.” Measure it, fix it in the component (not the post), and add the measurement to the CSS comment.
When you’re unsure, ask for options. “Give me 3–5 different directions as one labelled contact sheet” gives you something to react to, which is faster than describing what you want.
Step 8 — Extras That Make It a Real Workflow
Once the core works, small additions turn it into your team’s actual workflow:
- Story versions: the same templates at 1080×1920, with the top and bottom kept clear of the app’s interface.
- Other languages: a single class that flips the layout for right-to-left or left-to-right scripts and switches to a font that supports the language.
- Registration QR codes: generated in brand colours, with tracking parameters stripped so the code is less dense, and decoded from the final image every time.
- Matching assets: form headers, banners and slides from the same tokens, at their own canvas sizes.
- A design-tool copy: the same tokens and templates published to a design tool that supports design systems, for teammates who’d rather work visually.
Ready-to-Paste Prompts
Use these in order with Claude Code or Codex, opened in an empty folder. Replace everything in [BRACKETS], and attach or link your brand files where the prompt says so.
1. Kick-off: audit the brand
I want to build a design system for [BRAND NAME] that an AI agent
can operate: I describe a post in one message and get a finished
PNG that matches our existing style. It must be deterministic:
HTML/CSS rendered to PNG with headless Chrome. Image generation is
only for art (illustrations, textures, background photos), never
for text or logos.

Brand sources:
- Logos / design files: [FOLDER PATH or DRIVE LINK]
- Past posts to match: [SOCIAL PROFILE URL or FOLDER OF
  SCREENSHOTS]
- Colour palette (if documented): [HEX CODES or IMAGE]
- Languages and script direction: [e.g. English / Arabic RTL]
- Formats: [e.g. feed 1080x1350, stories 1080x1920]

First, audit the sources and report back before building anything:
1. The exact fonts. Read them from inside the design files
   (PDF/.ai/.psd embed them), and say which are free on Google
   Fonts.
2. The palette with hex codes. Sample any gradients or extra
   colours from real designs.
3. The logo files and which colour variants we need.
4. The 5–8 recurring post types, and the recurring visual "moves"
   (shadows, frames, textures, patterns) that make our posts
   recognisable.

Save screenshots of 10–15 representative real posts in
assets/_reference/.
2. Build the foundation
Now build the system in this folder:
- brand.css: tokens (colours, fonts, spacing) and one class per
  component, sized in real pixels for a [1080x1350] canvas
  (.post), plus .story [1080x1920]. Name classes after what they
  are in our brand. Comment anything non-obvious, including why.
- brand.js: only what CSS can't do (inline icons, auto-fitting
  long titles).
- render.mjs: renders any post HTML to PNG with installed
  Chrome/Edge, no npm packages; canvas size comes from the .post
  class.
- assets/logos/: every logo as a tight, transparent PNG in each
  colour variant we need.
Use only the brand's real fonts, colours and logo files. Never
approximate a logo.
3. Build the templates
Create one template per recurring post type from the audit, in
templates/. Each is a complete, realistic post with real-looking
content (no lorem ipsum), built only from brand.css classes, with
a comment at the top saying what it's for and what to edit. Render
every template to PNG, look at each image, fix overlaps and
spacing, and make a contact sheet of all templates side by side.
Compare it with assets/_reference/ and tell me where ours looks
more generic than the real posts.
4. Write the rulebook
Write AGENTS.md: the rulebook a fresh AI agent follows to turn a
one-line brief into a finished post. Include: defaults (what to
deliver, what extra words trigger); the workflow (extract brief,
pick template, copy, edit content only, render, look at the PNG,
QA, caption, reply with paths); colour roles and proportions; the
type scale; date, time and number formats; layout rules; a "Never"
list; a table of our signature moves mapped to classes; the
templates with a decision rule for choosing; art-generation prompt
recipes with a reject list; our caption format copied from real
captions; and a QA checklist. Add CLAUDE.md containing
"@AGENTS.md".
5. Test it with a fresh agent
Spawn a fresh subagent that knows nothing about this conversation.
Give it only this brief: "[A REAL UPCOMING POST IN ONE SENTENCE],
and a story too". Tell it to read AGENTS.md and follow it exactly,
without changing brand.css or the templates. When it finishes,
have it report every place AGENTS.md was unclear, wrong or missing
something it needed. Then fix the rulebook and the system for each
point.
6. Everyday use
Make a post for [EVENT or TOPIC]: [DATE], [TIME], [PLACE], [PRICE
or free]. Registration link: [URL] (put a QR code on the design
and the link in the caption). Logo of our partner attached. Make
the story version too.
Give me 3–5 genuinely different design directions for this post
as one labelled contact sheet (A–E), and recommend one.Make a [LANGUAGE] version of this post and its story. Mirror the
layout if the script direction changes, and use a font that
supports the language.7. Turn feedback into rules
[YOUR FEEDBACK, e.g. "this looks like a generic template" / "the
background art is distracting"]. Fix it in this post, then change
the system so it never happens again: update brand.css or the
template if it's a component problem, and add the rule to
AGENTS.md so future sessions follow it. Show me the rule you
added.
8. Generate art without the AI look
Generate the hero art for this post with [IMAGE TOOL]: [SUBJECT].
Use the illustration (or photo) recipe from AGENTS.md exactly: our
palette hexes, no text or letters, no faces, transparent
background for illustrations, candid phone-photo look for photos.
Trim it, place it, render the post, and reject and regenerate if
you see letters, warped geometry, off-palette colours, glow or
more than one subject.
Common Pitfalls
- Describing the brand instead of extracting it. “Teal-ish, modern, friendly” produces generic results. Real font files, sampled hex codes and reference screenshots produce your brand.
- Fixing posts instead of the system. If you correct the same thing twice, it belongs in
brand.cssorAGENTS.md. - Generating anything with structure. Text, logos, patterns and QR codes come out almost right, which is the worst outcome. Draw them in code.
- Trusting “looks fine”. Fonts with deep descenders, QR codes that stop scanning at small sizes, and art drawn under text are all easy to miss by eye and easy to catch with a check.
- Skipping real photos. The system makes generated art passable. Real photos make it good. Use your own whenever you have them.
Conclusion
A prompt-driven design system doesn’t replace a designer. It captures a designer’s work (the palette, the fonts, the layouts, the small moves that make a brand recognisable) in a form an AI can apply correctly every time. After that, a polished, on-brand post takes one sentence, and anyone on the team can make one.
Start small: three templates, a short rulebook, and one real post. Let the feedback rounds do the rest.